Foil Invitations
- Print as soon as today
- Flat & folded cards
- Ideal for weddings, birthdays & baby showers
Features
- Print as soon as today
- Flat & folded cards
- Ideal for weddings, birthdays & baby showers
Make Luxury Invitations With Foil Invitation Printing
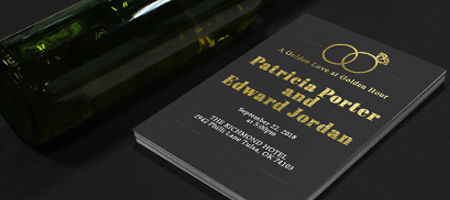
You can now make the invitation of your dreams with foil invitation printing. Also called foil stamping, this printing method lets you cover any part of your design in foil to make your invitations look shiny and gorgeous.
Gold foil printing is often used for wedding invitations, but are also suitable for red carpet functions. You can print metallic invitations in your choice of color for any event that calls for pizzazz or extra flair.
Foil invitations come in three colors: gold, silver, and copper. Invitations can be printed on budget-friendly, 14 pt. uncoated cardstock or 16 pt. silk-laminated cardstock. We encourage you to try silk lamination as it makes spot UV coating and foil color more prominent on top of making them waterproof. We offer four size options, all of which can have rounded corners.
Foil Printing File Preparation Guidelines
What should I keep in mind while creating the foil design?
Use these design guidelines to create an effective foil design:
- The minimum font size requirement would be 7 or 8 points.
- Avoid using small or thin fonts or lines for foil objects.
- Borders and strokes must be more than 1.5 points.
- The mask and CMYK design file should match one another. Make sure each layer’s respective elements align with the other version of the design.
How should I prepare my file for foil printing?
You need to submit a file with two layers. For foil printing orders: the standard CMYK layer and the foil mask layer.
The mask layer should show where the foil printing will be applied. Mark the foil area with 100% K or black and then render the non-foil parts in white.
For example, the images below show that the text in black will be foil, while the white background is the non-foil section.


Spot UV File Preparation Guidelines
What are the best design practices for spot UV printing?
- Limit the text’s font size to a minimum of 7 or 8 points.
- Border and stroke should be above 1.5 points.
- Place a 1/16” gap between spot UV and metallic or foil printing areas. The spot UV areas cannot overlap with the metallic or foil printing sections.
How should I prepare my file for spot UV printing?
Your regular color file should come with a spot UV template layer that shows where to apply the spot UV printing.
Apply 100% K to the section that will have spot UV.
Color all other areas without spot UV as white.


