33 Checkpoints: quality printing at the speed you need.

All Products
Marketing Materials
Business Essentials
Appointment Cards
Business Cards
Carbonless Forms
Direct Mail
EDDM
Envelopes
Key Card Holders
Letterhead
Loyalty Cards
Mailing Services
Plastic Business Cards
Round Business Cards
Presentation Folders
Self-Seal Envelopes
Silk Presentation Folders
Square Business Cards
Standard Business Cards
#9 Envelopes
#10 Envelopes
Boxes & Packages
Labels & Stickers
Banners, Posters & Signs
Promotional Items
All Products


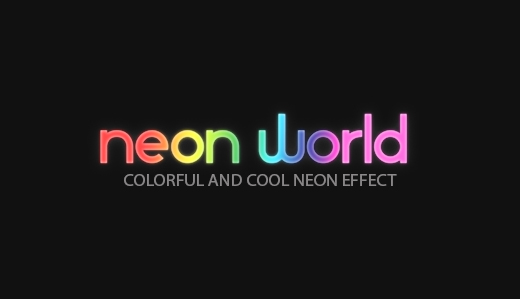 1. This font requires a dark background to get the best results; create a dark background layer. 2. Create a white font layer. Duplicate the font layer, place underneath in layer order, and hide it for later use. 3. Rasterize your original font layer and then apply a layer style by going to Layer>Layer Style>Gradient Overlay. Choose a “normal” blend mode and move the opacity bar to around 70%. Choose a colorful gradient from your gradient menu and set the style to “linear”. The scale should be at around 70%.
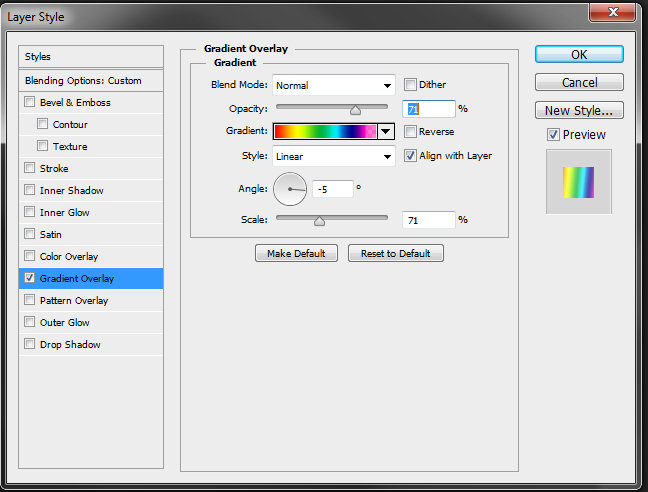


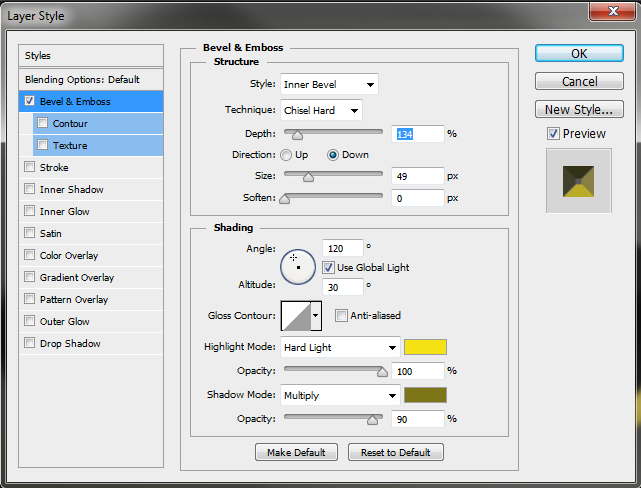
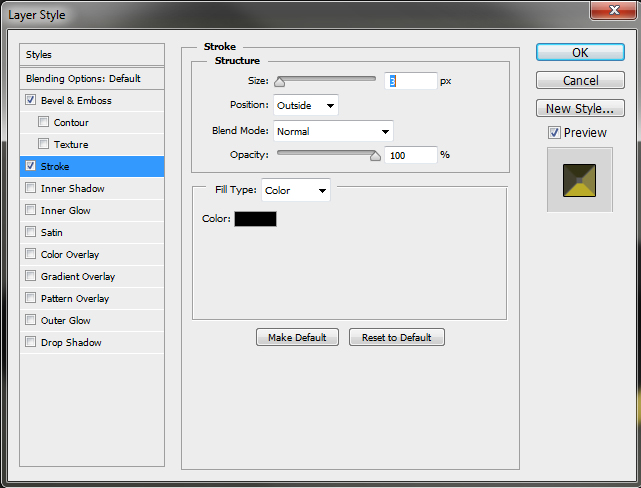
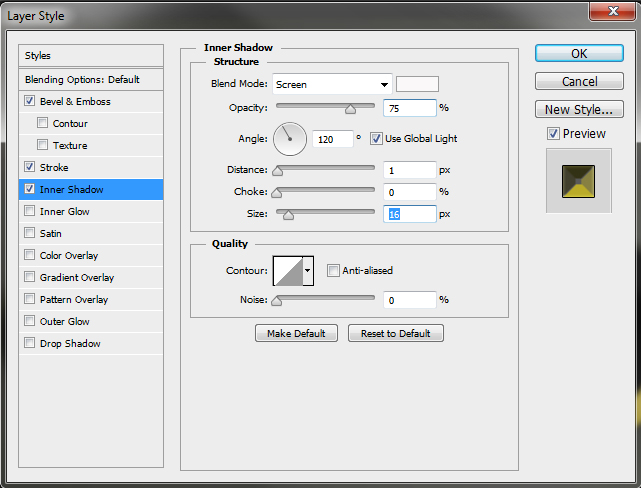
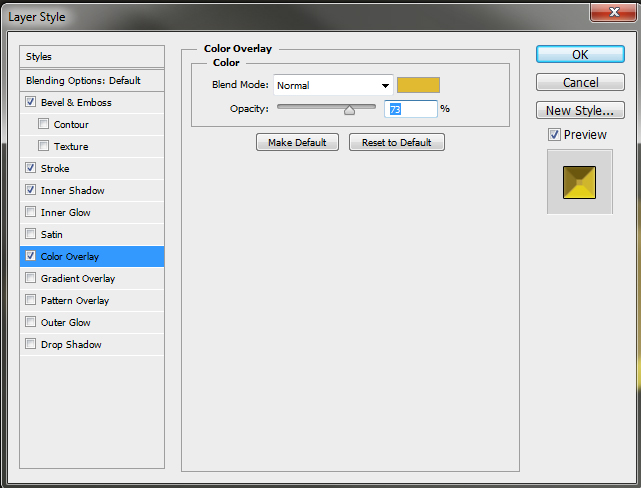
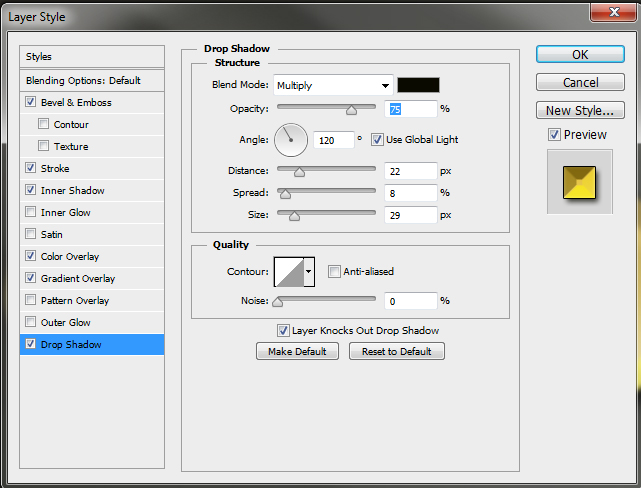
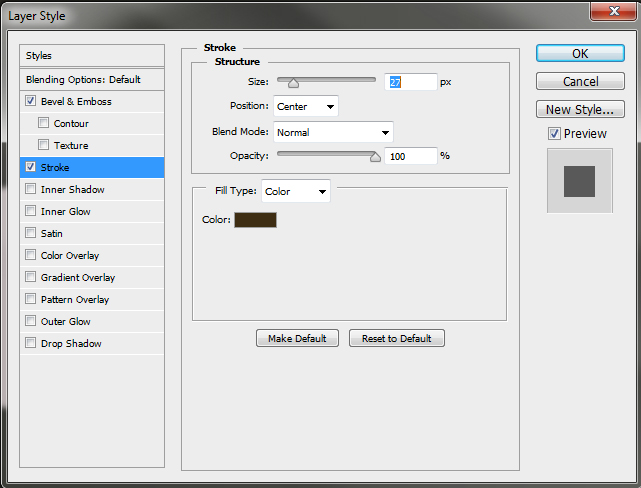
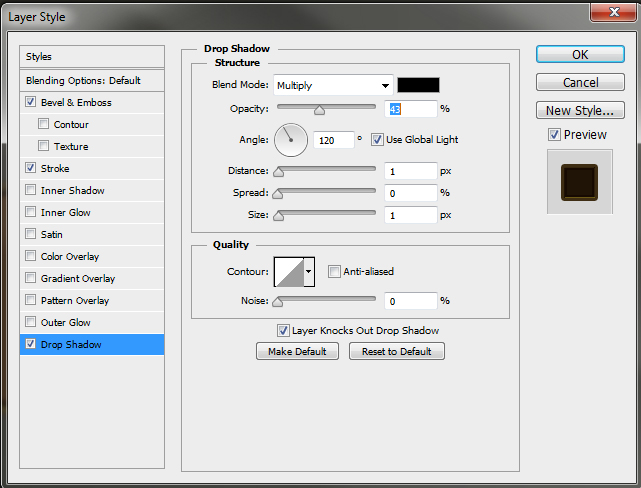
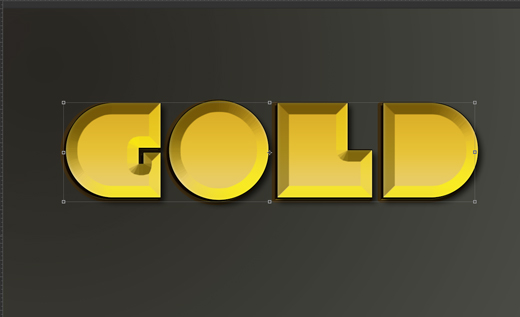
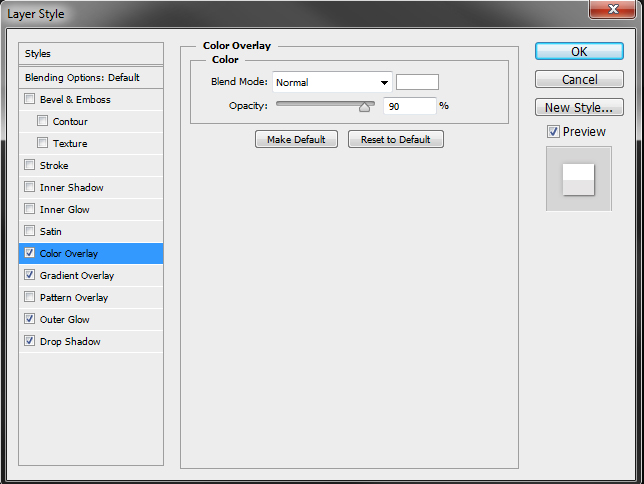
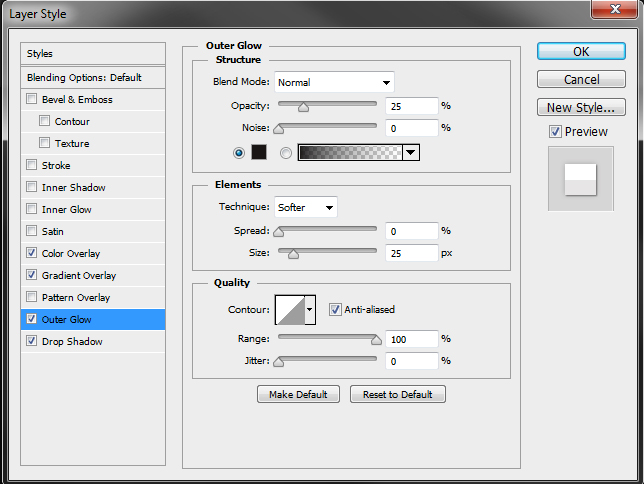
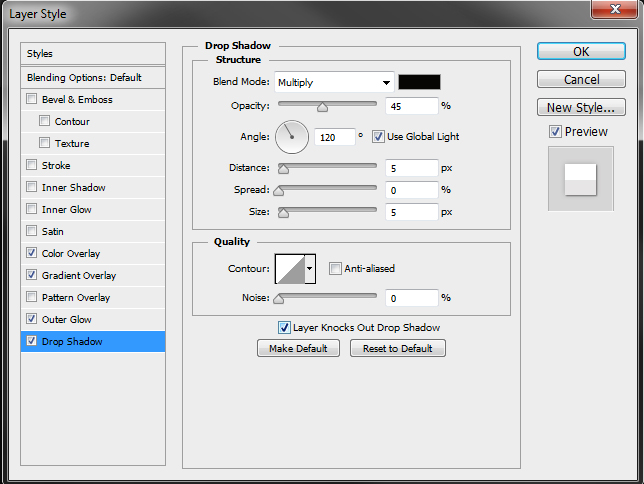
 1.This is a really easy text effect that consists of copying and pasting multiple text layers to create a 3d appearance. Create your original text layer (white) using the following layer style menu settings:
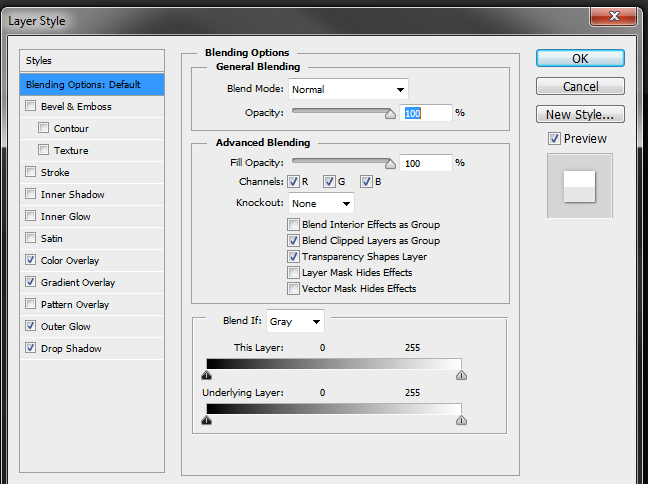

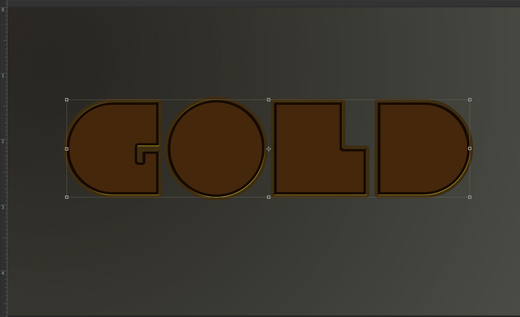
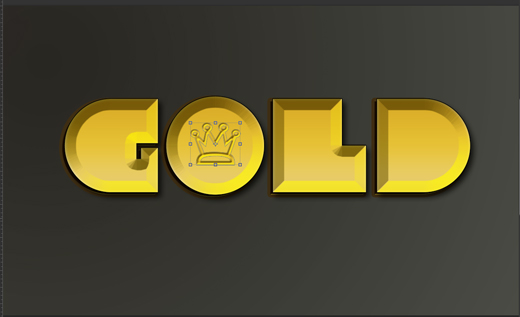
 3. Copy font layer and place layer beneath the original in layer order.
  4. Repeat this 3 more times to create the 3D effect.