Custom Product Builder
  Custom Boxes
  Custom Stickers
  Custom Labels
  Custom Postcards
  Promotional Items
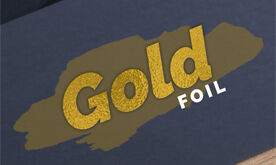
 Foil Hang Tags
- Comes in gold, silver & copper
- Spot UV adds brilliant shine
- Draws customer attention
Features
- Comes in gold, silver & copper
- Spot UV adds brilliant shine
- Draws customer attention
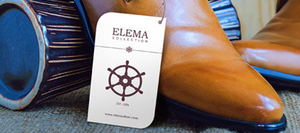
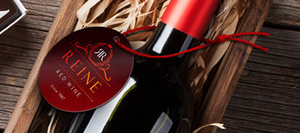
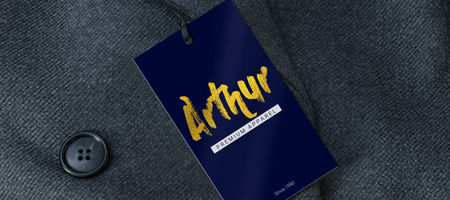
Foil Hang Tag Printing: Make Ordinary Hang Tags Glorious
Foil hang tags add elegance to products they’re clipped on to. With foil hang tag printing, you can breathe new life into your old hang tag designs.
Foil printing lets users add a metallic film on top of their existing design for decorative reasons. This process works perfectly well with hang tags. Metallic hang tags attract attention by putting emphasis on your designs. You can use it to make text or graphics become the focal point of your hang tags.
You can choose from three foil color options: gold, silver, or copper. Combined with silk-laminated coating and a spot UV finish, your foil hang tags will ooze class and elegance. The extra-thick 16 pt. cardstock adds some much-needed heft. And because there are many size options to choose from, you will find one that’s best suited for your product.
Take your hang tags to the next level and print foil hang tags today.
Foil Printing File Preparation Guidelines
What should I keep in mind while creating the foil design?
Use these design guidelines to create an effective foil design:
- The minimum font size requirement would be 7 or 8 points.
- Avoid using small or thin fonts or lines for foil objects.
- Borders and strokes must be more than 1.5 points.
- The mask and CMYK design file should match one another. Make sure each layer’s respective elements align with the other version of the design.
How should I prepare my file for foil printing?
You need to submit a file with two layers. For foil printing orders: the standard CMYK layer and the foil mask layer.
The mask layer should show where the foil printing will be applied. Mark the foil area with 100% K or black and then render the non-foil parts in white.
For example, the images below show that the text in black will be foil, while the white background is the non-foil section.

Spot UV File Preparation Guidelines
What are the best design practices for spot UV printing?
- Limit the text’s font size to a minimum of 7 or 8 points.
- Border and stroke should be above 1.5 points.
- Place a 1/16” gap between spot UV and metallic or foil printing areas. The spot UV areas cannot overlap with the metallic or foil printing sections.
How should I prepare my file for spot UV printing?
Your regular color file should come with a spot UV template layer that shows where to apply the spot UV printing.
Apply 100% K to the section that will have spot UV.
Color all other areas without spot UV as white.