Recently updated on November 11th, 2017 at 01:00 am
1. Use a Template
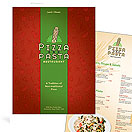
The first step in creating a restaurant menu design is picking the size and finding the right template. When it comes to menus there are a variety of choices. Check out Next Day Flyers Thick Cardstock Menus and Glossy Paper Menus for popular menu printing sizes.
Next Day Flyers offers templates for both choices in a variety of program versions such as Photoshop, Illustrator, and InDesign. Your first step should be to download these templates and become familiar with the specs. Using the template will ensure your menu printing comes out just right!
2. Pick a Style
If you are starting a new restaurant you probably have already picked out a theme for your restaurant and if you are creating the design for a restaurant you need to ask the client what style they want the restaurant menu to be in. For example, if the business is a classy Italian restaurant you need to have a menu that reflects that.
Your style can be reflected in a variety of elements such as the menu’s color, typography, design elements and even the copy! For example, if you want an authentic feel for your Italian restaurant you could include all the menu items in both Italian and English. You might also include imagery that is reminiscent of Italy and design elements that relate as well.
3. Gather Your Content
Before you can start creating a menu design in your template you need all the content that is going to be on the menu. Menus are usually pretty packed with content and space is limited so you need to have all the content in order to know exactly what you have to work with. The content should include everything such as images, menu items, prices, the logo and other important information.
If you can’t get the content ahead of time and need to start the design right away, research similar restaurant menus and add some dummy content similar to what you see in the menus you found. Then swapping in the new content should be a bit easier when you get it.
4. Create a Grid
Once you have the content you should open your template and create a grid based on that content. The best way to create a grid is to pick a number of columns such as 1, 2 or 3 columns and then use rules in the design program to space them out. When you are setting up the grid don’t forget spacing between columns and also be sure to keep in mind how the menu will actually be handled.
You need room for peoples finger’s and you should keep things in mind such as font size. If your fonts are too small they could be hard to read. Using a menu should be easy and the key to that is having a grid and organizing the content properly by appetizers, entrees, desserts, drinks, etc.
5. Pick a Finish
Before you print your menu designs you need to consider one last option, which is the finish. Next Day Flyers prints menus on 14 PT Ultra-thick Cardstock and 100lb Glossy Paper, which are perfect for menu designs and will help them last a long time, especially if you add a cover to the menus once printed.
Next Day Flyers has several different menu printing finish options which are a matte finish and a high gloss UV coating. UV gives you high gloss and durability while the Matte printing finish gives you a flat satin finish that won’t show fingerprints and makes colors more vibrant. The high gloss coating is also very durable and has a beautiful finish. All are great options for menu printing, so it’s just a matter of personal taste.
We hope you enjoyed these menu design tips and be sure to print your menus with NextDayFlyers to get the best quality printing possible, affordable prices and super fast turnaround times.
Consider your target audience and the restaurant’s lighting when you are planning your design. A brightly lit diner catering to college students can have much smaller text and finer detail than a candle-lit supper club catering to an older crowd. Make a mock-up of your design and try to read it in a similar setting to the one your audience will be in.
Also, check and double-check spelling! Food terms can have unusual spellings (not to mention accents and other special characters), so be sure you have the right spelling (And just because the chef says it’s spelled that way doesn’t mean he’s right–check it yourself to be sure.) Misspellings on a menu make it look very unprofessional.

Two additional points to remember:
Consider your target audience and the restaurant’s lighting when you are planning your design. A brightly lit diner catering to college students can have much smaller text and finer detail than a candle-lit supper club catering to an older crowd. Make a mock-up of your design and try to read it in a similar setting to the one your audience will be in.
Also, check and double-check spelling! Food terms can have unusual spellings (not to mention accents and other special characters), so be sure you have the right spelling (And just because the chef says it’s spelled that way doesn’t mean he’s right–check it yourself to be sure.) Misspellings on a menu make it look very unprofessional.
it’s GREAT , Really Thanks 🙂